Cut CI/CD Costs With Own GitHub Actions Runner
GitHub Actions is a powerful CI/CD platform, and it gets even better when you take control by hosting your runner. In this post, I’ll walk you through how to set up a self-hosted runner on a Windows machine, explain the benefits, use cases, and how it compares to GitHub-hosted runners. Whether you want faster builds, better environment control, or to reduce CI/CD costs, this guide has you covered.
What is a Self-Hosted runner?
A self-hosted runner is your machine (physical or virtual) that you configure to run GitHub Actions workflows. Unlike GitHub-hosted runners, which spin up a clean VM for each job, self-hosted runners are persistent and under your full control.
Let's set up a self-hosted runner on Windows. There are a few things on a checklist that we need to check before setting self self-hosted agent. You need to make sure you have Windows 10/11 or Windows Server 2016+ along with a GitHub repository. Next, you need to create a directory where you want to download and execute the GitHub runner. In my case, I used my D: drive, and inside it, I have dedicated a folder D:\usmanrafiq-actions-runner. I did that through PowerShell commands.
D:
mkdir D:\usmanrafiq-actions-runner
cd D:\usmanrafiq-actions-runner
Next, you need to go to your repository and its Actions tab, there on the left side menu, you will see the Runners menu, click that, which will navigate you to the page with all available runners for your repository. You will observe, the unners page has two tabs, the first one is GitHub-hosted runner and the second is Self-hosted runners, and a green button named New Runner, click that.
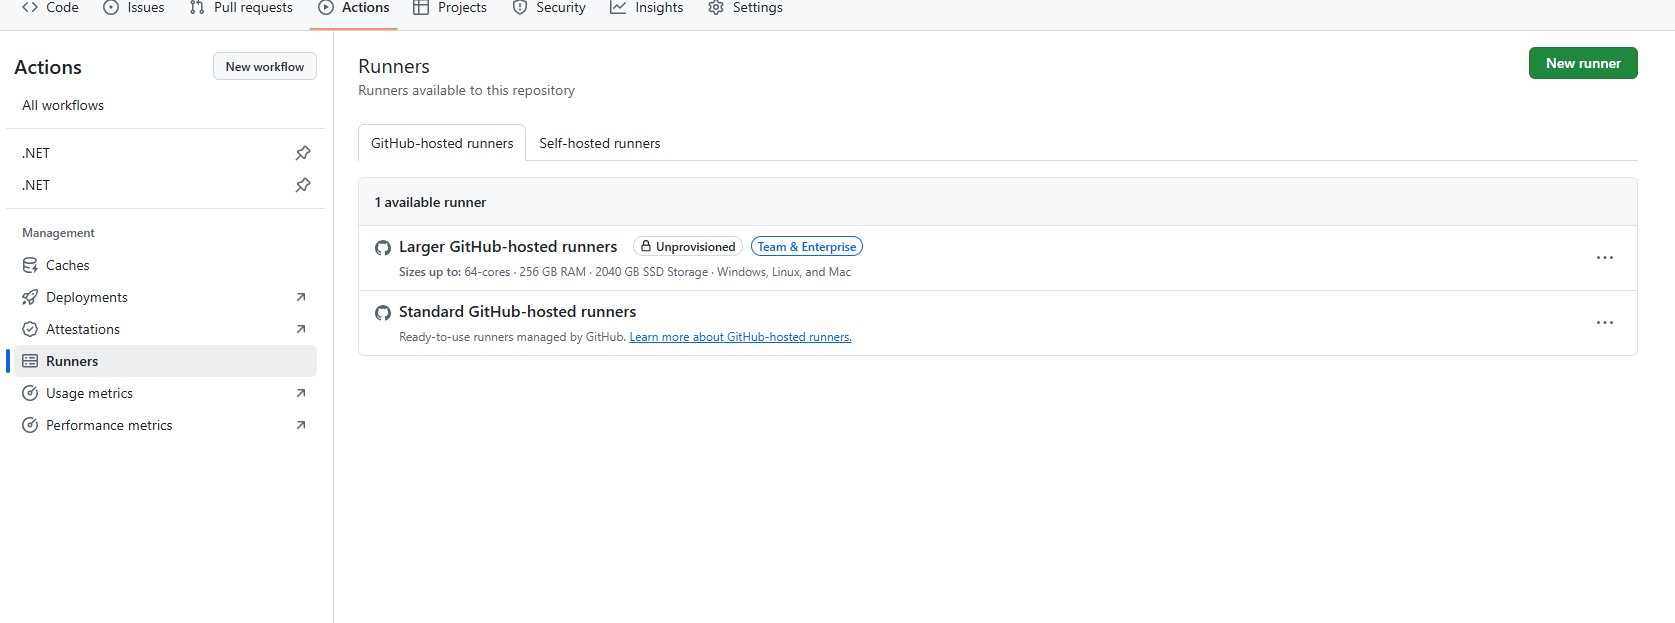
After that, you will be displayed a page with a New self-hosted runner button, click that and choose the OS option you want, in my case, I choose windows.
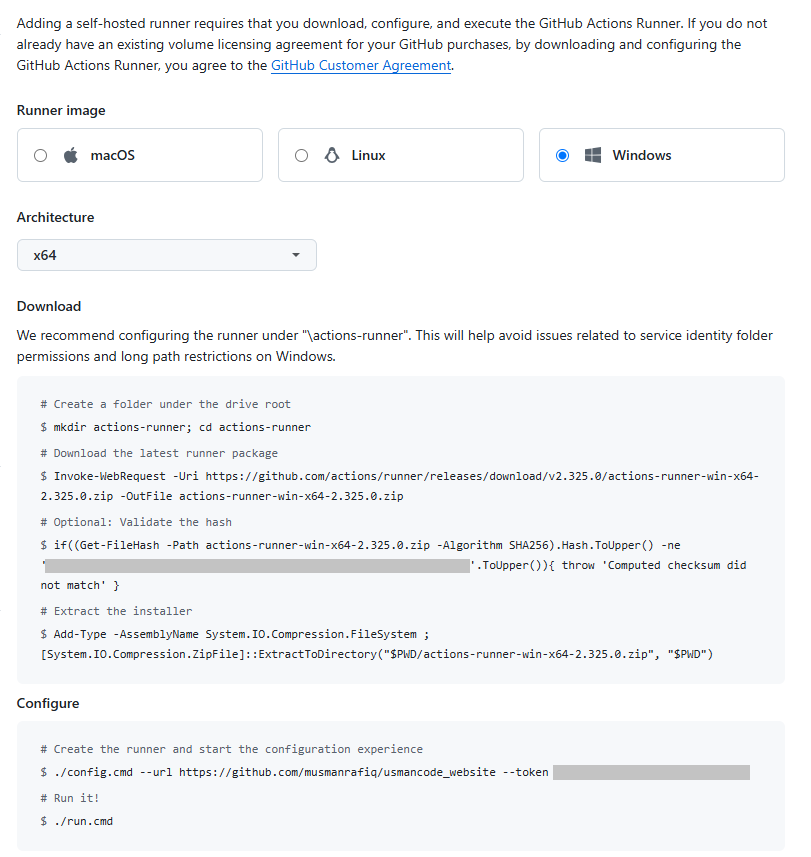
With that, you have already executed the first line of the script shown in the above screenshot. Next in that folder, you need to run Invoke-WebRequest through PowerShell, ignore the validation part, it's not required. After that run the extract installer command, and once done, run the config command. During that process, you will get a prompt to make the runner a service. I don't like that option, because I want to control the runner's execution, when required, I will execute the last line i.e. ./run.cmd.
And that is it, with these few steps, which would hardly take 15 minutes, you can set up your own runner for your repository. One thing more, if you have a personal GitHub account, per repository only one runner is allowed, it can't be shared between the repositories, but if it's an organization, then the runner can be shared between its repositories. Until the next time, stay curious and keep coding.